

A co-op migration moves a world and its player saves to a dedicated-server installation. Copying the files is only part of the job: the destination must select the correct world, co-op settings can override the server configuration, and the original host’s character may need separate repair. Preserve the original save and test the destination privately before anyone resumes play.
If you already have a dedicated server, this is usually an import, not a co-op migration. PalCommand can adopt an existing installation in place. Use the import instructions for that case.
Keep an untouched copy of both worlds
Close the co-op session and stop the destination server before copying files. For a Windows
Steam co-op save, start in %LOCALAPPDATA%\Pal\Saved\SaveGames\<Steam ID>\<world GUID>\.
This path does not describe Xbox or Microsoft Store save storage. Locate the actual
co-op world you intend to move; do not choose a folder solely because its timestamp looks recent.
Keep a separate copy of the full source world, including its player files, and back up any world
already on the destination. Store those copies outside the active server’s save directory.
A dedicated Windows server normally keeps worlds below:
Pal\Saved\SaveGames\0\<world GUID>\
Retain the world data, its metadata, the Players directory when present, and the server’s
configuration. Copying only Level.sav does not preserve everything a player expects to find.
An unjoined test world may have no player files at all, so successful startup is not a character
recovery test.
Understand the host-character risk before joining
The co-op host’s player identity can differ from the identity assigned on a dedicated server. PalCommand’s preflight checks for the known placeholder host save and warns that joining before repair can lose character or Pal ownership. It does not rewrite the character data to fix that identity. A warning acknowledgement is not proof that the save is repaired.
Keep the destination private. If preflight reports this condition, read its linked repair guidance and confirm that any community tool supports your save version. Work on a copy and keep the original. If you cannot establish compatibility, stop the migration rather than experimenting on the only save. A game update or a tool’s claim of support does not establish that your world and every player’s identity were preserved.
Copy the world and select it deliberately
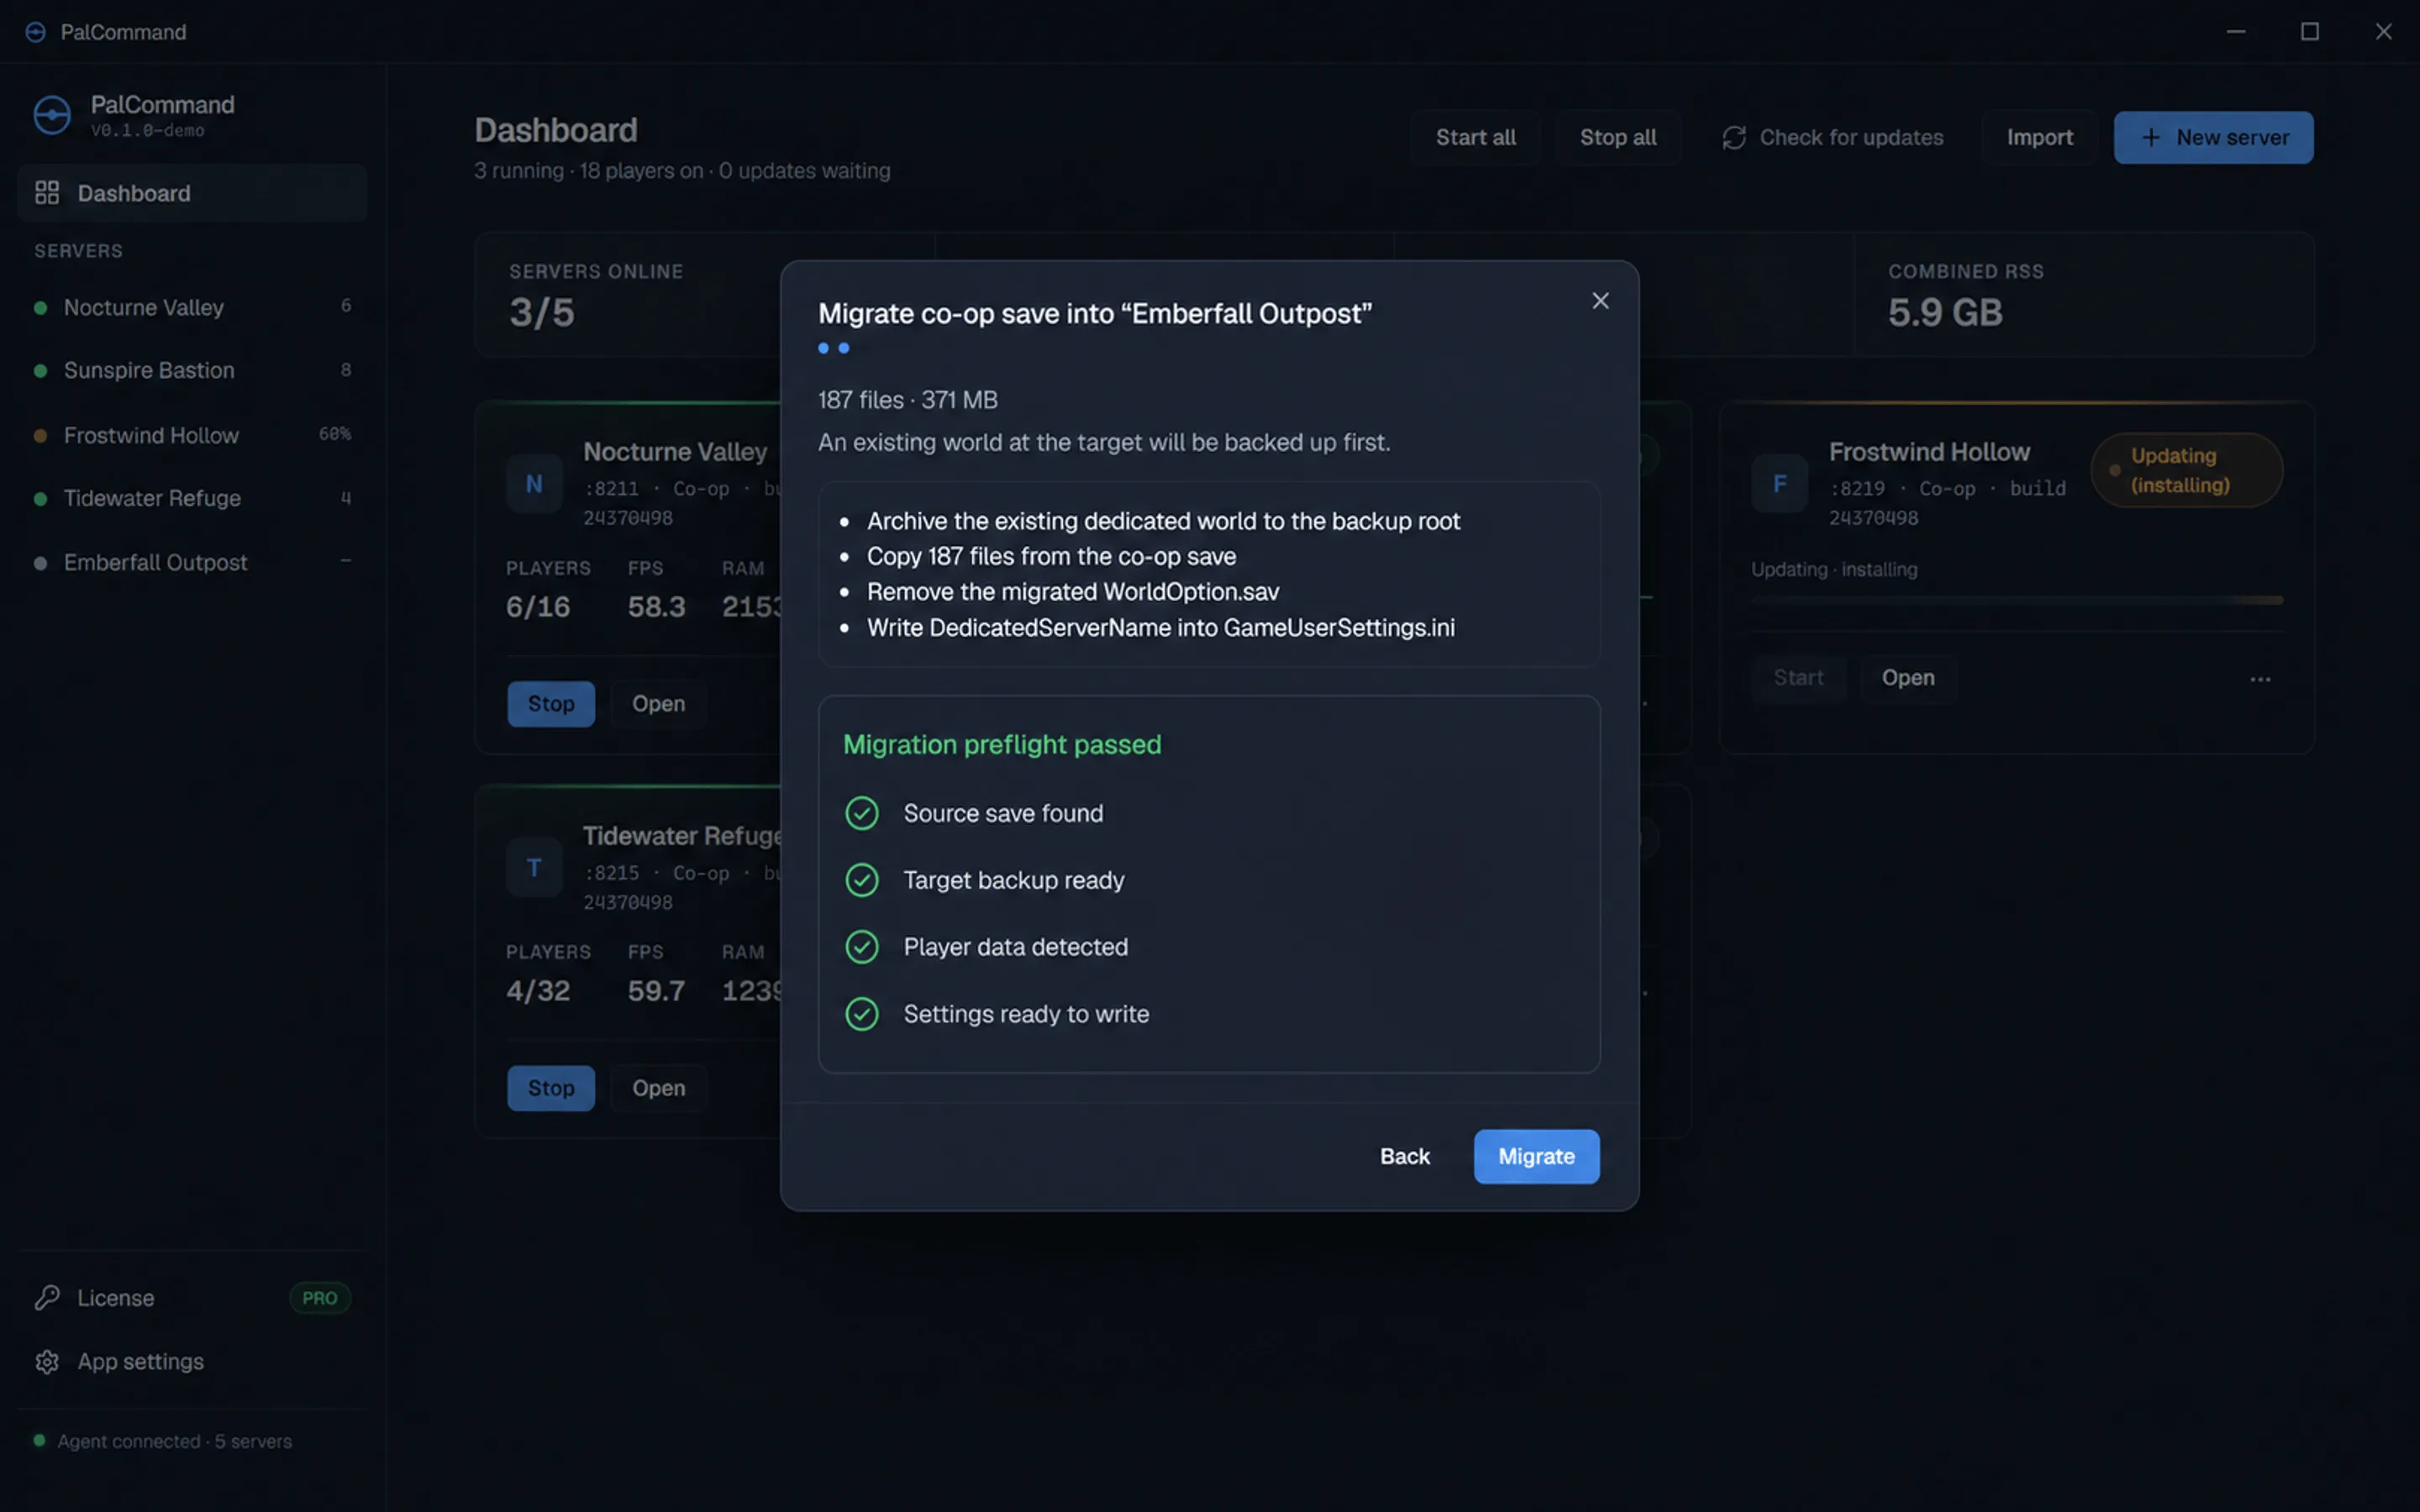
In PalCommand, use the stopped server’s menu and choose Migrate co-op save…. Select the source, inspect the preflight’s file count, size and destination, and read the warnings. After migration, save the report and the location of the previous-world backup.
For a manual Windows Steam transfer, copy the intact world-GUID folder into the destination’s
Pal\Saved\SaveGames\0\. In Pal\Saved\Config\WindowsServer\GameUserSettings.ini, set
DedicatedServerName=<same world GUID> under [/Script/Pal.PalGameLocalSettings] to select
that world directory. Preserve the other sections and settings when changing that value. Avoid leaving several
candidate worlds mixed together: PalCommand’s backup and repair tools expect one active world.
Move any previous world to its separate backup location only after verifying that backup.
In our migration test, a small real world was copied between two Windows installations and its file hashes matched. The restarted server reported the migrated world GUID. That proves the tested copy-and-select path; it does not prove that an established co-op host can join with all their progress intact.
Check WorldOption.sav if settings are ignored
An imported WorldOption.sav can make the co-op world’s settings take precedence over
PalWorldSettings.ini. If the server appears to ignore your dedicated-server settings, check
for this file before repeatedly editing the INI.
PalCommand detects it and offers Repair while the server is stopped. Repair parks a copy as
WorldOption.sav.migrated-backup; it does not rewrite the world save to merge settings. The
migration workflow also reports how it handled the file. Keep the report and preserved copy so
you can undo the change. Use the current server configuration reference
to decide which dedicated-server settings you actually want.
Verify players and recovery, not just startup
Before opening the server to the group, confirm the intended world, bases and settings. Then check the host and another player’s character, inventory and owned Pals on the private test destination, after any required identity repair. Save, restart and check persistence again.
If the wrong world loads or a character is missing, stop and preserve the failed destination for diagnosis. Return to your untouched source or a verified backup; do not keep joining and overwriting it with new progress. PalCommand’s backup and restore workflow explains how to inspect archives and restore a stopped server.
Evidence and limits
Our 30 July 2026 Windows 11 tests used server v1.0.2.100933, Steam build 24370498. They checked byte-preserving world copying, world selection and reversible WorldOption repair. The host-save fixture was synthetic, not a real co-op player’s successful rejoin. This guide was reviewed on 5 September 2026; it is not a claim that host-character repair has been retested on every subsequent game version. See the PalCommand migration feature for the product’s scope and limits.
Continue with the PalCommand workflow, see the related server-management features, or read another guide.